The complete guide
How to Choose and Get the Most From a Gemstone Dig Kit
The problem with most "science" toys
Plenty of kits promise science and deliver about four minutes of activity. A card gets folded, a sticker gets stuck, and the box goes under the bed. Kids are quick to spot the difference between doing something real and going through the motions.
A gemstone dig kit sidesteps that because the task is genuinely slow and genuinely physical. There are 15 real gemstones inside a solid brick, and nobody can see them until the work gets done. No shortcut exists. You chip, you brush, you look, you chip again. That rhythm is what holds a child's attention long after a louder toy has stopped being interesting.
The payoff is also real. At the end you have a tray of actual mineral specimens, not tokens. They can be washed, sorted, labelled and shown to anyone who visits. That small pile is often where a lasting interest in rocks begins.
How a dig kit actually works
The dig brick is made from a compacted material soft enough to break apart with hand tools but firm enough to hold its shape in transit. The gemstones sit scattered inside at different depths. Some sit close to a surface and turn up in the first few minutes. Others are buried deep and only appear once most of the brick has been worked through.
The included tools do two different jobs. The chisel breaks and loosens material, working in from the edges and corners rather than driving straight down into the middle. The brush clears dust away so your child can actually see what they are doing. Most of the progress comes from the brush, which surprises people. Chiselling without brushing just buries everything again.
The magnifying glass matters more than it looks. Once a stone is out and rinsed, holding it under magnification shows crystal faces, banding, flecks and the glassy or waxy surface that separates one mineral from another. That is the point where identification becomes possible, and it is why the best real gemstone science kit always includes a lens rather than leaving you to find one.
What comes in the box
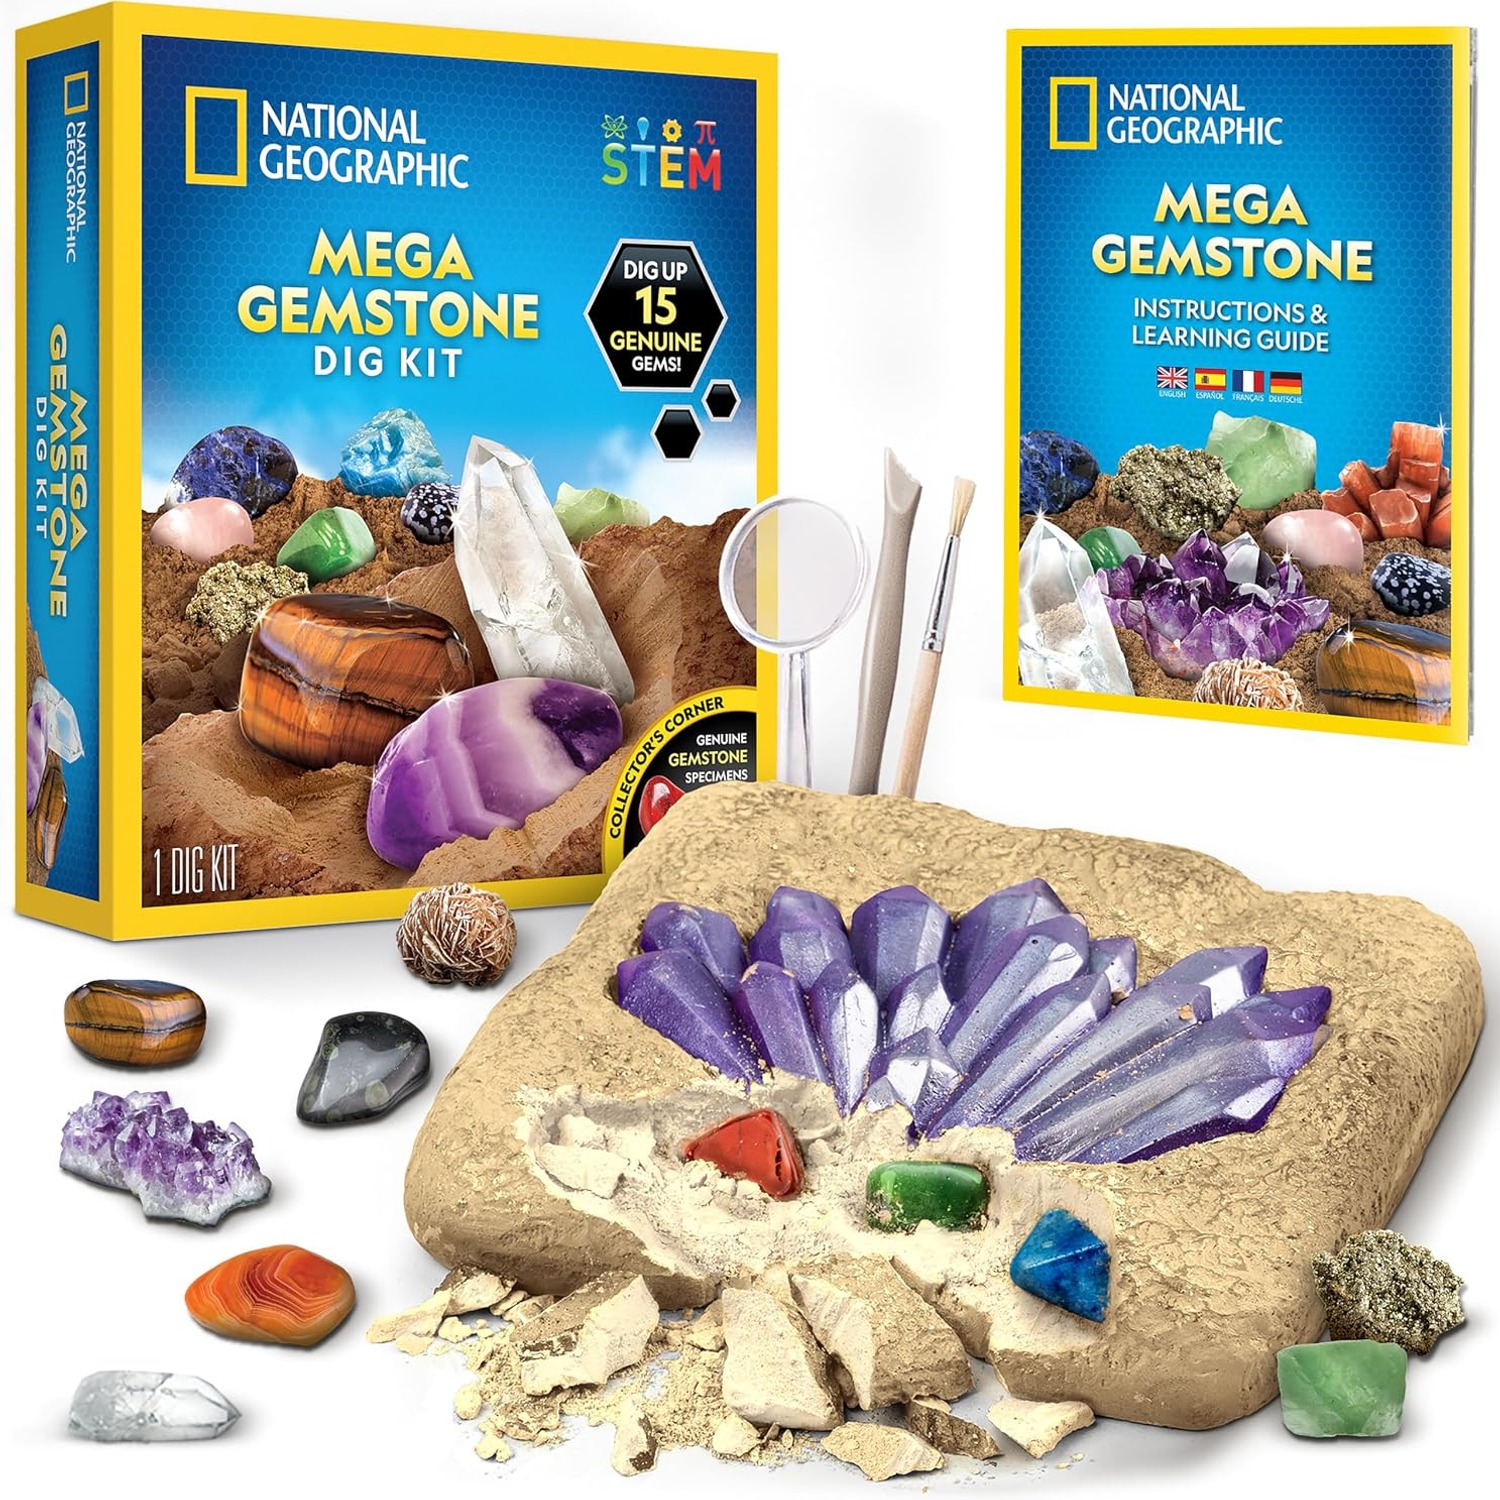
The contents are listed plainly. There is a large dig brick holding 15 gemstones, digging tools, a chisel, a brush, a magnifying glass, and a 16-page full-colour learning guide. No assembly is required.
The guide is the piece people underestimate. It explains how gemstones form inside the earth and how they are mined, then helps young scientists match each specimen they recover to a name. Without that, a dig kit is just a mess with a prize at the end. With it, the child is doing a cut-down version of what a field geologist does: extract, clean, examine, identify, record.
The whole package weighs 0.52 kg and measures 18.4 x 5.5 x 21 cm, so it is easy to post and easy to store.
Who it suits
The manufacturer recommends ages 8 and up, and that number is sensible rather than cautious. An eight-year-old has the hand control to use a chisel accurately and the patience to keep going when nothing has turned up for ten minutes. They can also read the guide independently, which changes the experience from "parent reads out facts" to "child looks something up".
It works especially well for children who already like collecting. If your house has jars of beach pebbles, sorted bottle caps or a shoebox of interesting sticks, this will land well. It is also a strong option for a child who prefers making and finding over competing, and for anyone looking for a best geology kit for kids that does not need a screen or a subscription.
Younger siblings usually want in. The practical answer is to give them the brush and the sorting tray while an older child or adult handles the chisel. That keeps everyone busy and keeps small hands away from the harder strikes.
Choosing between dig kits
If you are comparing options, a few things separate a good kit from a filler one.
First, check whether the specimens are real. Some cheap sets bury dyed plastic or glass. This one contains 15 real gemstones, which is the whole reason the activity is worth doing.
Second, look at the tool list. A kit that includes a chisel, a brush and a magnifying glass is ready to go. Kits that skip the brush are frustrating, and kits that skip the lens miss the best part.
Third, read what the booklet does. A one-page checklist is not the same as a 16-page guide covering formation, mining and identification. The learning content is what turns a one-off afternoon into something a child comes back to.
Fourth, consider the size of the brick. A single large brick with 15 stones gives a longer, more satisfying dig than several tiny bricks with one stone each. There is more suspense when you genuinely do not know how many are left.
Setting up for a good session
Lay down newspaper or work on a baking tray with a lip. The brick produces fine dust as it breaks up, and containing it from the start saves cleaning later. Outdoors on a step or a patio is the tidiest option if the weather is kind.
Have a small bowl of water nearby for rinsing finds, plus a cloth. Washing a stone as soon as it comes out is motivating, because the colour jumps once the dust is gone.
Set out a tray or an egg carton with compartments for the stones. Numbering the slots and ticking them off against the guide stops anything being lost in the debris, and it turns the dig into a record-keeping exercise as well as a physical one.
Finally, keep expectations realistic about pace. Striking hard does not speed things up and risks chipping a stone. Short, controlled taps near the edges work far better. If your child gets tired, cover the brick with a cloth and come back tomorrow.
Caring for the finds
Once everything is out, rinse the stones under cool running water and pat them dry. Skip soaps and solvents. Store them separated so harder stones do not scratch softer ones, and keep the magnifying glass somewhere safe rather than loose in a toy box.
The dig brick itself cannot be reused once it is broken apart. Sweep the leftover material into a bag and put it in household waste rather than washing it down a sink. Tools and the guide stay with the collection and get used again whenever a new specimen turns up on a walk.
Making it last beyond the dig
The collection is the long game. Once a child has 15 identified stones, they start noticing minerals everywhere: in gravel driveways, on beaches, in museum cases. Add a notebook and the guide becomes a reference rather than a one-time read.
Some families follow up with a trip to a local museum or a fossicking spot, using the same brush and lens. Others simply add a shelf. Either way, the kit does its real work after the digging is finished.
The short version
The Mega Gemstone Dig Kit gives a child 15 real gemstones buried in one large brick, along with a chisel, a brush, a magnifying glass and a 16-page full-colour guide. It carries the National Geographic sub-brand under Blue Marble, is made by JMW Sales, Inc., needs no assembly, and is recommended for ages 8 and up. The box weighs 0.52 kg and measures 18.4 x 5.5 x 21 cm.
It is slow, slightly messy, and genuinely absorbing. If you want a gift that keeps a curious child busy for an afternoon and leaves them with something real to keep, this is a solid choice.