The complete guide
How to Choose an Electronics Starter Kit for Kids
The problem with learning electronics from a book
Ask most adults what they remember about circuits from school and you will get a vague answer about a diagram with a battery and a bulb. The diagram was fine. The trouble is that a drawing of a circuit teaches you what a circuit looks like on paper, not what it does. Kids learn the same way the rest of us do, by touching something and watching what happens.
The usual barrier is the hardware. Real electronics means stripped wires, soldering irons, breadboards with stiff little holes, and a long list of ways to get it slightly wrong. A nine-year-old who spends twenty minutes trying to get a jumper wire to stay put does not come away thinking electronics is interesting. They come away thinking it is fiddly.
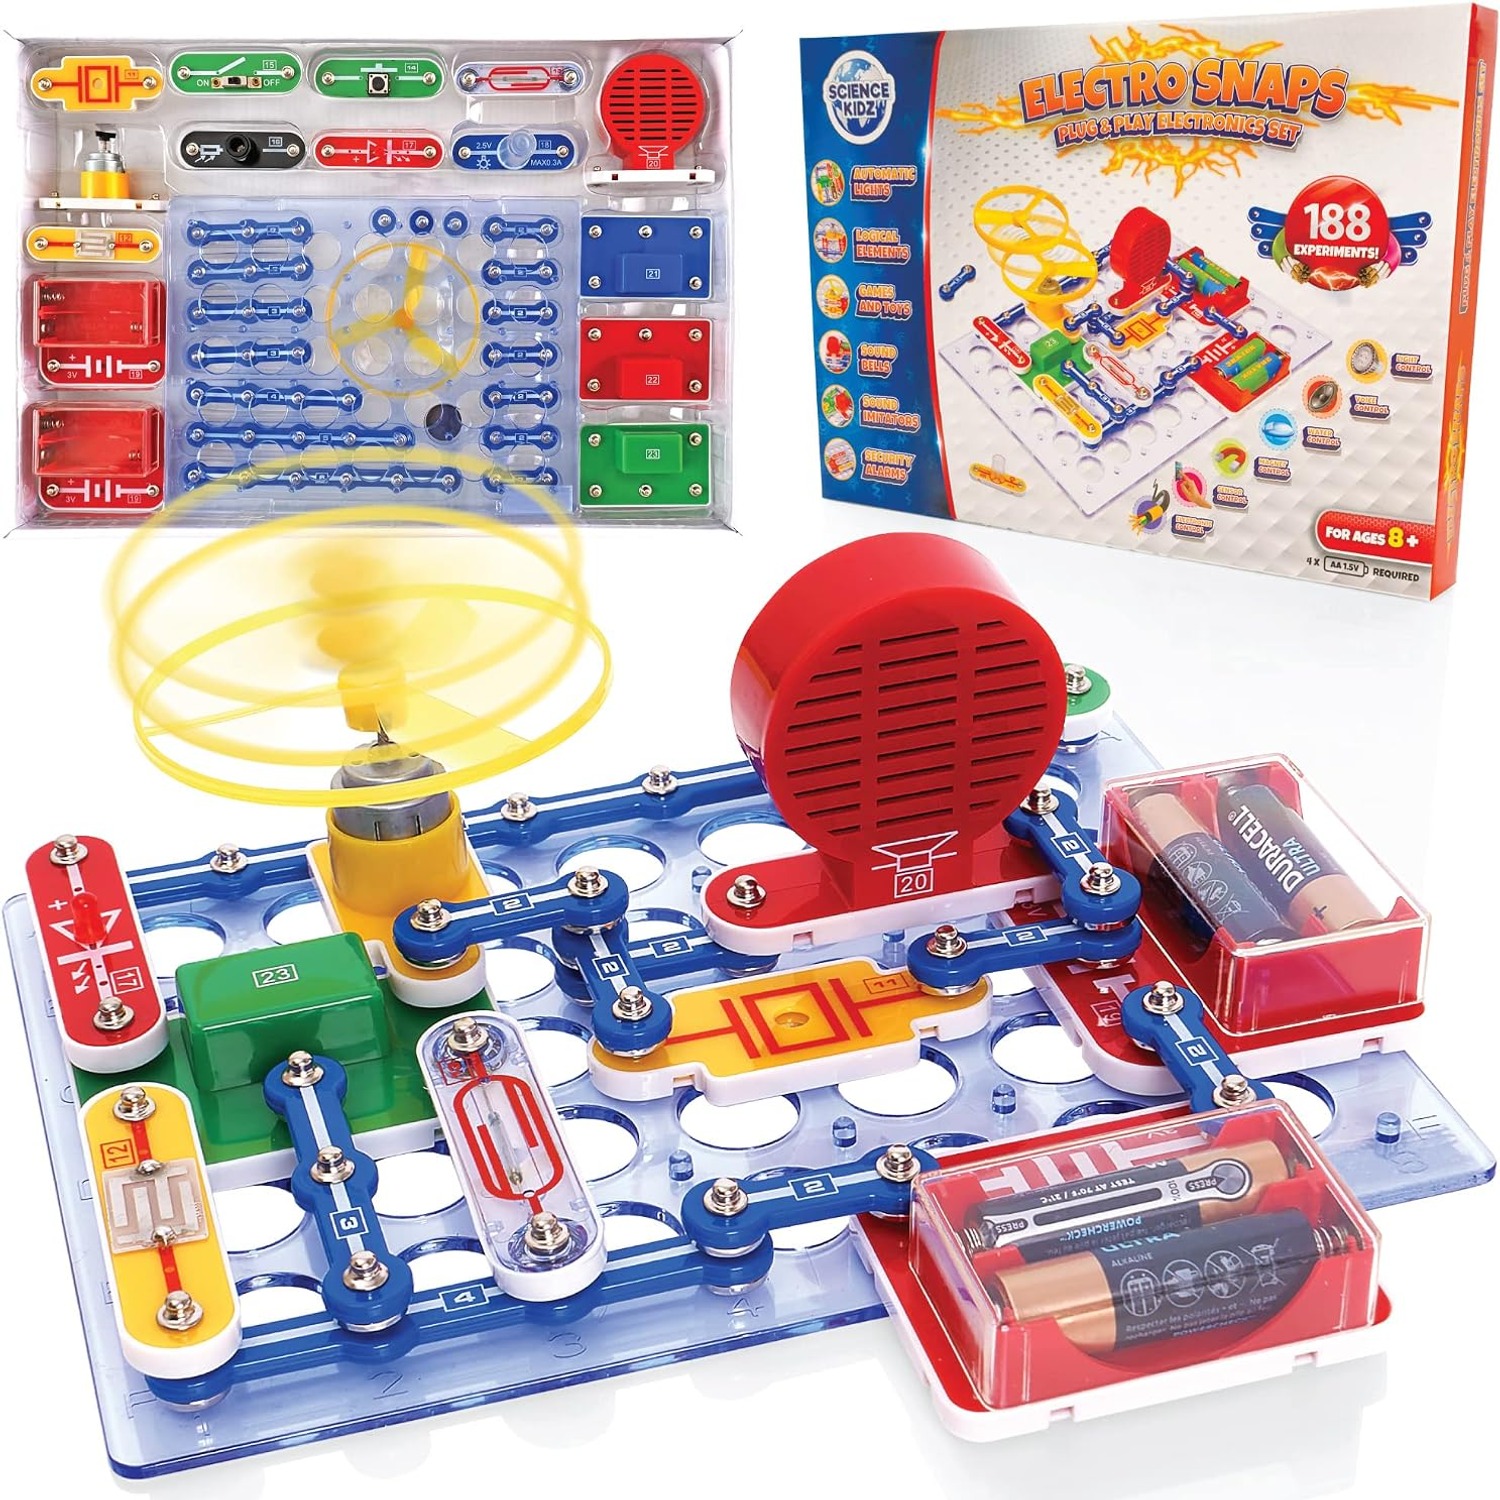
An electronics starter kit built around snap-together parts removes that barrier. Each component sits in a plastic block with press studs on top, and you build by pressing blocks onto a grid base. There is no stripping, no soldering, no tiny screws. A child can go from an unopened box to a lamp that lights up when they flick a switch in a handful of minutes, and that first success is what buys you the next hour.
How a snap together circuit kit actually works
The base is a plastic grid with rows of contact points. Each component block has studs underneath that line up with the grid and studs on top so other blocks can bridge across them. Wires are also blocks, just ones that carry current from point A to point B. Switches, lamps, buzzers, resistors and motors all follow the same format.
Because every component looks like the symbol printed in the manual, the layout on your table matches the picture almost exactly. That one design decision does a lot of work. When something does not switch on, a child can compare their build to the picture and spot the difference themselves rather than needing an adult to debug it.
Power comes from alkaline batteries, so the voltages involved are low. That is what makes this sort of kit sensible for home use. You are not plugging anything into a wall socket. The circuits still behave like real circuits, with real current flowing and real components doing their jobs, but the consequences of a mistake are a build that does nothing rather than anything dangerous.
The Science Kidz set here is model 261 in its snap-together circuit range. Assembly is listed as not required, so there is nothing to put together before the first project. The box weighs 0.9 kg and the set itself measures 40 cm x 27 cm x 4 cm, which is roughly the footprint of a large placemat.
Who it suits
The manufacturer gives a recommended age of 0 to 10 years. In practice the sweet spot is the stretch where a child can read short instructions and follow a picture, which for most is somewhere between six and ten. Below that, an adult needs to drive the build and the child supplies the enthusiasm and the switch-flicking, which is honestly a fine arrangement.
Kids who like taking things apart tend to take to this immediately. So do kids who like puzzles, because tracing why a circuit is not working is a puzzle with a satisfying answer. Kids who mostly want a toy that does something impressive straight away are also well served, since the flying disc project tends to be the first one everybody builds.
It also works for adults who want a shared activity that is not a screen. Families looking for the best rainy day activity kit usually want something with more than one afternoon in it, and a graded project manual delivers that better than a single-outcome toy. Teachers and homeschooling parents use sets like this because the setup time is close to zero.
Choosing between kit types
There are three broad options when you are shopping for a first electronics set, and they suit different people.
Snap-based kits, like this one, prioritise speed to a working result. They cost a little more per component because of the plastic housings, but they get a beginner building immediately and they survive being packed away and dragged out again.
Breadboard kits give more freedom. You can build anything you can design, and the parts are cheap. The cost is patience. Loose jumper wires, tiny component legs and no printed project path mean a beginner needs an adult who already knows the subject sitting alongside them.
Single-project science boxes build one thing, usually well. They are great as a gift but they finish. If you want something that can be opened again next month, a project manual with a graded sequence is the thing to look for.
If you are weighing up the best STEM toy for 8 year olds, the honest question is not which kit has the most components. It is which kit your child will still be opening in six weeks.
What to look for in the manual
The manual matters more than people expect. A kit with great parts and a bad instruction book is a kit that gets used twice.
Good signs are colour illustrations rather than dense text, projects ordered so each one builds on the last, and short explanations of what the circuit is doing. The Science Kidz set includes an illustrated colour guide that runs from simple switch circuits up to sound effects, light shows and the spinning disc, with educational notes along the way.
Those notes are the difference between building and learning. A child who wires a buzzer and reads one sentence about why opening the switch stops the sound has picked up something they will carry forward. A child who just follows pictures has had fun, which is not nothing, but the notes are where the value sits.
Getting the most out of it
Set up on a hard, flat surface. A kitchen table beats carpet every time, because small parts that roll off a table can be found again. A tray or a shallow box lid keeps loose pieces corralled during a build.
Have fresh alkaline batteries ready before the box is opened. This record does not confirm whether cells are supplied, and nothing kills momentum faster than a finished circuit that will not power up.
Do not rush to the exciting projects. The early builds exist to teach the grid layout and the snap action, and skipping them usually means a confused child three projects later. Twenty minutes of simple circuits pays for itself.
Let mistakes happen. When a build does not work, resist the urge to fix it. Ask what the picture shows that the table does not. That comparison is the actual skill.
Looking after the kit
Components should stay dry. Wipe them with a dry cloth, or a barely damp one if something sticky has happened, and never rinse electronic parts under a tap.
Pack the pieces back into the tray at the end of each session. It takes two minutes and it is the single best thing you can do to keep the kit usable, because a snap kit missing three wire blocks is a kit that can no longer complete half its projects.
Pull the batteries out if the kit is going into storage for more than a few weeks. Leaking cells corrode battery holders and that is a hard repair on a sealed plastic block.
Give the connections a quick look before each session. Bent studs and cracked housings are easy to spot and easy to work around once you know about them.
The short version
A snap together circuit kit solves one specific problem, which is that real electronics has a steep first step and kids give up on steep first steps. By putting components in blocks that press together on a grid, this electronics starter kit gets a child from closed box to working circuit fast, then keeps them going with a graded manual that adds one idea at a time.
It suits curious primary-age kids, works for classrooms and homeschool lessons, and runs on low-voltage battery power with no tools and no assembly. Set size is 40 cm x 27 cm x 4 cm and the parcel weighs 0.9 kg. Have batteries ready, use a hard table, and let the first failed build be the moment the learning starts.